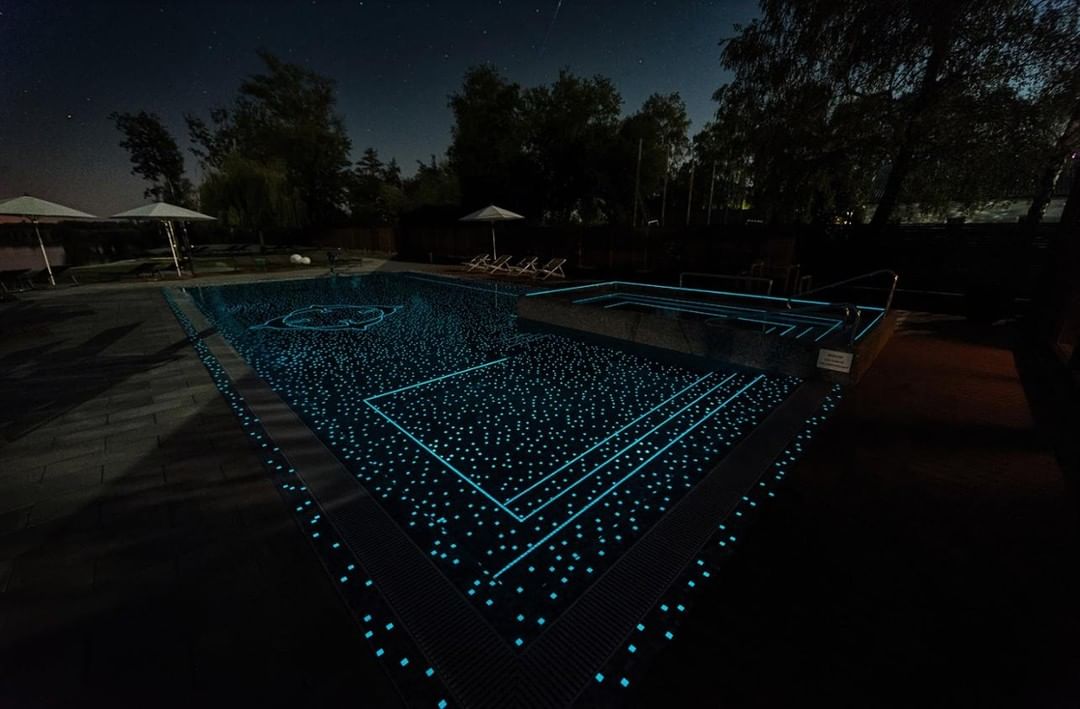
A pool mosaic decision is not only about choosing the most attractive blue. The tile, joint pattern, grout colour, lighting, water depth and installation system all work together. A sample that looks subtle on a desk can feel very different across an entire pool.
This guide gives homeowners, architects, pool contractors and dealers a practical way to compare options before an order is placed. It is not a substitute for project-specific technical advice: always confirm substrate preparation, waterproofing, adhesive, grout and curing requirements with the relevant manufacturers and an experienced installer.
The short version
Define the application, shortlist the visual direction, review physical samples in real light, confirm the complete installation system, calculate quantity with sensible contingency and approve the final batch before installation.
1. Begin with the application, not the colour
Start by listing exactly where the mosaic will be used. A fully submerged swimming pool, a waterline band, a spa, a wet wall and a decorative dry-area feature do not create identical demands. Share the project type, location and intended surface with the supplier so the recommended product can be checked against the actual use.
For a swimming pool, also note the pool shape, steps, benches, curves, overflow channels and any custom artwork. These details affect sheet handling, cuts, joint alignment and the amount of material required.
2. Choose a visual direction for the whole pool
Pool colour is the combined result of the mosaic, grout, water, depth, surrounding finishes and available light. Pale tones can create a bright, clean effect; deeper blues and greens can feel more dramatic; blends introduce movement across larger surfaces. The same tile can appear lighter in shallow areas and richer in deeper water.
Use surrounding stone, deck finishes, coping and landscape materials as part of the decision. The goal is a coherent palette, not an isolated tile choice.
3. Review physical samples in realistic conditions
Screen colours are useful for shortlisting, but they are not final approvals. Ask for current physical samples and view them:
- outdoors in direct daylight and in shade;
- next to the intended coping and deck materials;
- with the shortlisted grout colours;
- both dry and wet, where appropriate;
- from close range and from several metres away.
If tonal variation is part of the design, inspect multiple sheets rather than judging a single small piece. Before installation, compare delivered material with the approved sample and review the overall blend.
4. Check sheet format, joints and layout
Mosaics are supplied in sheets to make installation faster, but the finished surface should not reveal a visible sheet-by-sheet grid. Ask the installer how the sheets will be aligned and adjusted, particularly on large walls, floors, curves and steps.
Confirm tile dimensions, sheet dimensions, joint width, backing or mounting system, edge details and how inside and outside corners will be handled. A dry layout of several adjacent sheets can reveal alignment or blend issues before adhesive is applied.
5. Treat installation materials as one system
A quality mosaic can only perform as well as the surface beneath it and the materials used around it. The project team should agree on substrate preparation, waterproofing, adhesive, grout, movement joints, curing time and pool-filling procedure as one coordinated system.
Products used in continuously submerged areas must be selected for that service by their manufacturers. Do not substitute an adhesive or grout simply because it appears similar. Keep the current technical data sheets and follow the documented mixing, application and curing instructions.
Questions to settle before work begins
- Is the substrate flat, stable and properly prepared?
- Is the waterproofing system complete and tested?
- Are adhesive and grout approved for the application?
- Has the installer reviewed sheet alignment and curves?
- Are curing and filling dates included in the programme?
6. Measure carefully and allow for reality
Calculate the tiled area from the latest construction dimensions, not an early concept drawing. Include floors, walls, steps, benches, channels, returns and feature panels. Curved or highly detailed areas usually generate more cutting and should be measured separately.
Add an appropriate contingency for cuts, breakage, sorting and future repairs. The right allowance varies by layout and project complexity, so the final percentage should be agreed between designer, installer and supplier. Ordering too little can create delay and may make later batch matching more difficult.
7. Approve the batch and plan storage
Before installation, check product code, quantity and condition. Open material from several cartons and review the blend across a wider area. Store sheets dry, flat and protected from site traffic until they are required.
If the design includes a custom motif or mural, confirm artwork dimensions, orientation, reference points and installation map. Marking these details early is easier than correcting a reversed or misplaced feature once work has started.
8. Think about maintenance from day one
Ask the pool professional to provide a written water-care and cleaning routine for the completed installation. Appropriate chemistry, compatible cleaning products and regular inspection help protect the finish. Avoid abrasive tools or unapproved chemicals, and address damaged grout or isolated loose pieces promptly rather than allowing a small repair to grow.
A practical buying checklist
- Project type and all tiled areas are clearly defined.
- Physical samples have been viewed in project lighting.
- Tile, grout and surrounding finishes have been reviewed together.
- Sheet, joint, edge and curve details are understood.
- The installer has approved the proposed installation system.
- Final quantities include an agreed contingency.
- Delivered material will be checked before installation.
- Technical documents and maintenance guidance will be retained.
Frequently asked questions
Should I select pool mosaic from an online image?
Use online images to shortlist, then approve a current physical sample. Displays, photography, water depth and lighting can all change how colour appears.
Why does grout colour matter?
Grout changes the apparent contrast and rhythm of the mosaic field. Review real tile and grout samples together before approving the combination.
How much extra mosaic should I order?
There is no universal percentage. Cuts, curves, artwork and layout complexity affect wastage, so agree the allowance with the installer and supplier after final measurement.
When should the pool be filled after installation?
Only after the specified waterproofing, adhesive and grout curing periods are complete. Follow the written instructions from the relevant manufacturers and installer.
Shortlist the right mosaic with URS Mosaic
Share your project type, area, preferred colours and location. The team can help you review suitable options, samples and quantities.